Share
Pin
Tweet
Send
Share
Send
Hippie style, with flower applique, sewn on a typewriter and by hand. This charming model is not so easy to cope with, but the more compliments you will receive in your address!


Size 35 x 33 cm (without handles)
YOU WILL NEED
- fabrics a, in a flower and in a cage in various colors - from beige, burgundy, the color of a faded rose and khaki: 6 strips of 6.25 x 29 cm
- fabric b, khaki in flower: 1 strip 11 x 48 cm
- fabric c, in a burgundy-black strip: 105 x 110 cm (if the strips are parallel to the edges) and 90 x 100 cm (if the strips are perpendicular to the edges)
- fabric d, linen with a small pattern in pink: 70 x 110 cm
- fabric e, in a plaid in beige colors: 45 x 45 cm
- thick dense fleece for a pocket: 105 x 90 cm
- fleece: 105 x 90 cm
- white threads for hand stitches
- matching sewing threads
- floss sectional dyeing, suitable in color to fabrics
- 2 round buttons on a leg with a diameter of 8 mm
- 2 magnet clasps
- cardboard for templates
- wheel-cutter, ruler and substrate for cutting
- adhesive in aerosol packaging, traces of which are removed
MANUFACTURE
In the dimensions specified in the instructions, allowances of 0.75 cm wide are taken into account. Set the foot of the sewing machine to an allowance of 0.75 cm.
1) Cutting out the details
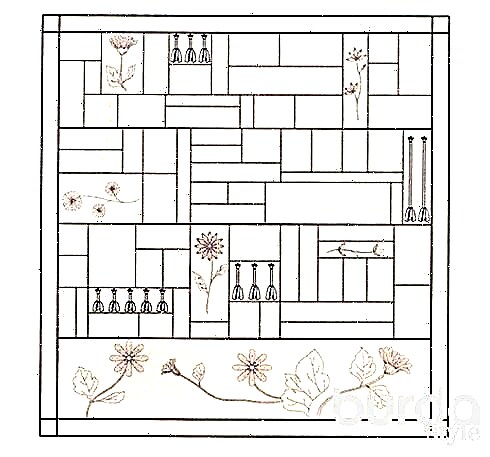
Reshoot the flower petals (see slide show), stick on cardboard, make an allowance of 0.5 cm along the contours and cut out.
• From fabrics, and cut out:
- 36 triangles, A (= 6 triangles from each strip) according to the figure (allowances for seams taken into account), shown in the slide show: put 6 stripes on top of each other and cut through all layers with a cutting wheel with an angle of 60 ° to the long sides using a ruler
- 6 large petals and 6 small (= 1 petal from the strip)
• Cut out from fabric b: 6 triangles B (as described above - as shown with a ruler)
• From fabric to cut out:
- 1 strip Fc 20 x 103 cm parallel to the stripes of the pattern
- 2 EU squares 38 x 38 cm each
- 2 Ns strips of 6 x 64 cm
- 1 strip C 7 x 35 cm
- 2 strips G 6 x 13 cm
• From fabric d cut out:
- 1 rectangle Dd 25 x 38 cm
- 2 squares Ed 38 x 38 cm
- 1 strip Fd 20 x 103 cm
• From fabric e (= square) cut along a long oblique stripe (see the figure in the slide show):
- cut the square diagonally
- fold the obtained 2 triangles with their front sides and grind on one short side (width of the seam allowances = 0.6 cm) so that the pattern changes direction, iron the seam allowances
- from the wrong side, parallel to the beveled slice, mark parallel lines at a distance of 3.5 cm from each other
- straight sections of the triangle, folding it with its face inward, combine, shifting one relative to the other by 1 marked strip, and grind (= marked lines form a spiral), iron the seam allowances
- cut the resulting part along the marked lines = long strip 3.5 cm wide
• From the volumenfliz cut out:
- 1 rectangle D 25 x 38 cm
- 2 squares E 38 x 38 cm each
- 1 strip F 20 x 103 cm
• From fleece for a pocket to cut out:
- 2 squares E 38 x 38 cm each
- 1 strip F 20 x 103 cm
- 2 strips N of 6 x 64 cm
2) Preparing the front pocket
• On 4 triangles, A grind together so that 9 triangular patchwork details are obtained (see Fig. 3).

• 4 patch pieces and 3 triangles B each into 2 strips, as shown in fig. 3. Stitch strips along the longitudinal side, iron allowances.
• Stitch strip C to the upper longitudinal section of the resulting part, leaving equally protruding ends on both sides.
• Place the part with the wrong side on the rectangle of fleece D in the center and glue with adhesive in an aerosol package.
• On strip C, 3 cm from the bottom cut, sew a hand stitch with a white thread in a straight line.
• Reshoot the front pocket template from the photo from the slide show (bottom of the bag) and stick it on cardboard.Cut, lay in the center on top of the manufactured part and circle around the contour. Cut off excess hardened fabric (= all layers) along the contour.
• On top of the sewing seams of triangles B and strip C, lay the goat seam manually with a thread floss.
• Place the fabricated pocket on the rectangle Dd and circle around the contour. Detail cut out.

3) Assembling the front and back of the bag• Apply glue to both sides of square E from the volumeumen flies. Then sequentially fold 1 square E of fleece (to strengthen the bag), square E of volumenfliz with adhesive and 1 square of Ec, glue the parts (for durability on the square of fleece and square Ec, you can additionally apply glue on the corresponding side). Make the second part the same way. On both squares, sew a machine stitch in the form of a lattice with an interval of 3.5 cm (angle = 45 °).
• Resize the front / back part of the bag in full size from the photo on the slide show and stick it on the cardboard. To cut.
Place the template on one of the quilted squares, circle around the contour, cut off excess fabric (all layers). Similarly, cut the second part of the bag out of a quilted square.
Repeat the procedure with the squares Ed.
• On one of the quilted details, mark the height of the future pocket, lay out a little higher and pin 6 small petals in the shape of a flower above it (see photo).
Sew the petals by turning the slices manually with threads of the corresponding color (see Fig. 5).
• On the second quilted part, similarly perform the application “Big Flower”, supplementing it with a “boutonniere” from the remaining patchwork triangle (see Fig. 5 and 6).

• On one patch b, mark the contours of the round buttons. Around make an allowance of 0.5 cm and cut the details. On the circumference of each circle, skip the thread “forward” with a seam and, putting a button, pull the thread = tight button. Fasten the end of the thread. Sew the buttons in the form of the middle of the flowers (see Fig. 6).
• Embroider stalks with thread of section dyeing floss (see Fig. 6).
• Fold part d (= pocket lining) with the front side on the outside of the pocket and mark the fastening points of the magnet fastener on both parts. Attach the fastener parts; cm, cut from the remains of the front or back of the bag (see. Fig. 7).
• Glue parts d on the wrong side of the corresponding parts of the bag and pocket.
• Preparation of parts of the internal fastener:
- fold the strips G across in half and on the formed rectangles make a mark for the fastener. Straighten the strips again and on the front side according to the marks attach the fastener parts, grabbing for strength a piece of reinforced fabric, as described above;
- fold the strips again in half with the front side inward, chop the sections along the longitudinal sides and grind them at a distance of 0.6 cm. Unscrew the parts, iron the edges;
- fold 1 of the manufactured part (with the fastener up, the counterpart down) with the lining of the front and back of the bag (combine open sections with the upper cut of the lining in the middle) and pin.
4) Assembly of the side of the bag
• 1 part F for reinforcing the bag, 1 part F made of volumenfliz and 1 part Fc folded with their respective sides and glued, glueing the part made of volumenfliz on both sides. On the obtained part, sew with white threads a hand stitch in the form of lines parallel to the long side and located at a distance of 3.5 cm from each other. Cut off excess fabric (all layers) to a part size of 19 x 103 cm.
• Apply glue to the fleece and strengthen the Fd strip.
• According to fig. 8 fold the quilted strip across in half, chop off the slices. On the short side with open sections, lay the middle 15 cm and connect the ends of the segment with the corners on the side with a bend. On marked lines, cut off excess fabric.

5) Assembly of bag handles
• Cut strips for reinforcing H at the ends by 0.6 cm.
• Strengthen each Hc band by gluing on it in the center a band for reinforcement.
• Unscrew the ends of the Hs strips on the wrong side to a width of 0.6 cm and iron them.
• Fold the strips along the wrong side inwards, chop off the slices.
• Stitch the strips by laying a stitch at a distance of 0.3 cm along the open sections and at the ends of the handle.
• On each handle, along the fold at a distance of 0.3 cm, sew a hand stitch with white thread.
Bag assembly
• The upper section of the pocket, the upper sections of the front and back of the bag, as well as the upper sections of the side, should be edged with pieces of strip e of the appropriate length. To do this, fold the strip with the corresponding part with the front sides, pin and stitch at a distance of 0.6 cm from the slices.
Then, turning each section strip around the sections (on the front and back of the back along with sections of the fastener parts), unscrew the parts on the wrong side and, tucking them in, sew manually with matching thread colors.
• Place the pocket on the front of the bag on the front side and pin it together with the side and bottom sections.
• Place the ends of the handles on the lining of the front and back of the bag from the corners so that the open sections are directed outwards and pin.
• First fold the side of the bag with the front on the wrong sides and, strictly aligning the upper edges, pin and stitch, laying a line at a distance of 0.3 cm from the sections. Similarly, press the side to the back of the bag.
• To allow seam allowances of the side part to the front and rear parts and to continue open cuts of the handles, surround them with an oblique inlay as described above.
Model from the magazine "Burda. Patchwork" 01/2014.
Photo: burdastyle.
The material was prepared by Elena Karpova.
Share
Pin
Tweet
Send
Share
Send